
In the past we’ve spoken about how to properly store cross stitch threads and why you should put threads on bobbins, but the question still remains; how?
Unlike other storage methods, like chucking skeins in a draw, bobbins take time to wind, and if you have all 500 DMC threads it’s going to take you forever. So today, we’re running down all the ways to put embroidery threads on bobbins, so you can skip the pain, and take the easy route 😀
Hand Wind
We start with the standard in bobbin winding, and the one technique that you’ll do regardless of the situation. Sure, later options are faster, but if you only have one or two threads to put on skeins, you’ll do it by hand.
You start by pulling out one end of the skein without it knotting and simply wind around the bobbin.

Bonus: Use A Tin Can
Hand-winding however, really isn’t a foolproof system. Somehow, those threads just always manage to find a way to knot themselves, and believe us when I say it’s 100x worse when it’s a whole 8m skein knotted up. So we suggest removing your skein’s wraps and putting them over something like a tin can. You can start by either end this way, and it keeps the thread from knotting.

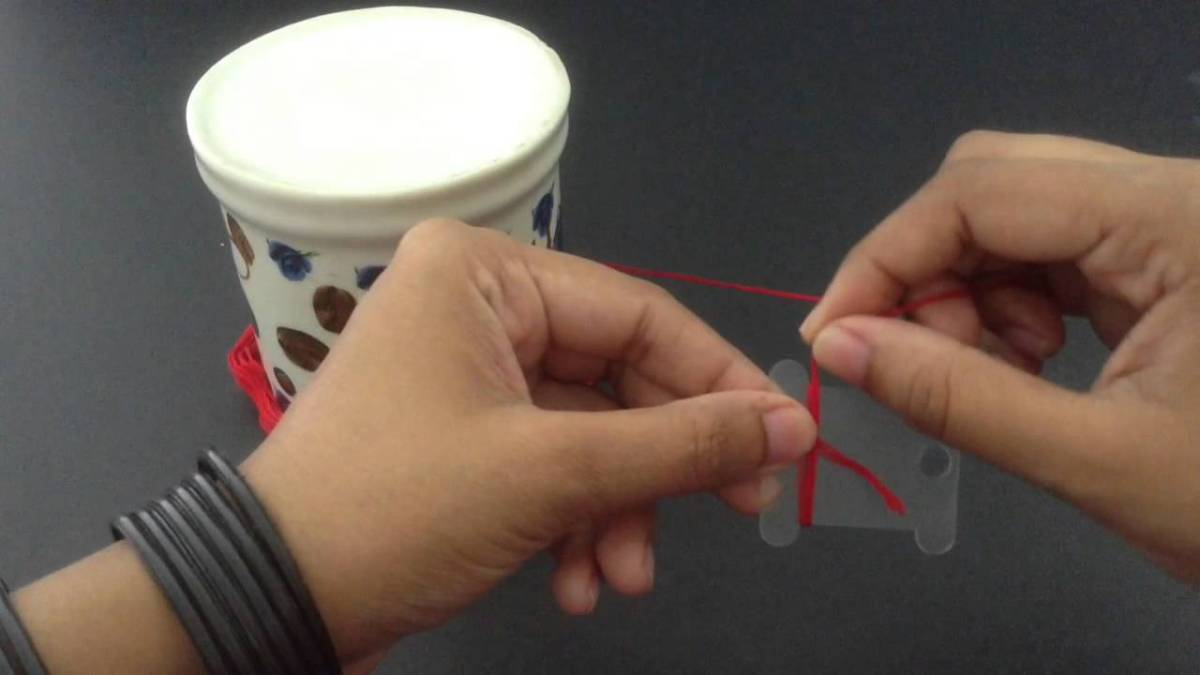
Use A Winding Tool

Hand-winding takes ages though; let’s face it, if you have a load of threads to do, you want something faster. So like many, you look towards tools to do the job. You’ve probably all found one of these things before, and brought one, they’re cheap enough after all, but seriously; THESE THINGS SUCK.
If I could give a single bit of advice to anyone, it would avoid these like the plague. However, if you’re so inclined, and have the knack for it that I don’t, they can save you time, and a lot of hand ache.


Use A Sewing Machine

However, now we’re done with the slow and painful methods, let’s talk about speed. This next technique requires you to have a sewing machine, however, we know a lot of cross stitchers also sew so you might have one. On every sewing machine is a bobbin winder! Sure, it’s not the type of bobbin we use for cross stitch, but with this handy guide on the LoveStitch Blog, you can cannibalize one of those hand winders to help out!

Use A Drill

But if you don’t own a sewing machine (and hope to farm the job out to someone else), try a drill. Without a doubt, this is the fastest and easiest way we’ve found to bobbin threads. Simply grab the bobbin in the drill chuck and spin away. What’s better is that you could probably bully the nearest male into doing it if you’re not bothered (let’s face it, all men are big kids, and we love drills); double win.


Labeling
That’s our list of how to bobbin your embroidery threads, however, there is one thing everyone asks; how do you label them?
Write The Number
Simple, right? Not so much. If you have paper bobbins writing the number is easy, but those plastic bobbins (which we would suggest you use) just don’t take pen. You can use a permanent marker, but you need to use a fine tip and write small.
Use The Official Number Stickers
There are official stickers you can get, direct from DMC (although they don’t include the newer 35 threads), but these things are worth ignoring, to be honest. You can get them to stick with some work, I find taping them down works well, but they can fall off.
Place The Label Under The Thread
However, the best way I’ve heard is to place the number label under the thread. You can slip it in there before or after you’ve wound the threads, and the number sticks out, reducing on both the high amount of waste in cross stitch and the effort of trying to write or stick something down.
How do you use a tin can???
Hey! Essentially you open up the skein (so its a ring) and pop it over the top of a tin can (full one, for weight). You can then pull one end and it won’t get knotted up!